

(this wonderful image is by Robbi Behr, who is a genius)
As you’ve been working on pages on your site, you might notice you’re ending up with widely different image sizes. This causes two problems: 1) ugliness and 2) file size issues. That last one you might not even notice, but a huge file coming from, say, your digital camera will take up way too much space on and slow down your site in disagreeable ways.
But right now, Professor Sibilia is noticing that the images are too differently sized on your pages, so let’s fix those.
SOLUTION ONE: When you upload and image, you’ll see on the page a few options above the ‘insert into post’ button:

Try to regularize your choices, by choosing say, medium, to have all images relatively the same size.
NOTE: Choosing the largest size does not mean you’ll have an image that size–most wordpress columns are roughly 600 pixels across, and the image will not appear wider than that. If you choose ‘full size’ and your image is 2500X3564 you’ll end up with an image that is 600 pixels across which a viewer can click on to see the full size in a new window. That’s only recommended in cases where it’s necessary–that’s a huge file which will take up a lot of space in site storage, and few vistors will even bother.
SOLUTION TWO: You should always think about solution one when loading your images–at least reducing them in size roughly, especially if they’re really large. If, however, you want to resize images on the page which you’ve already loaded, you can. Clicking on the already posted image, you’ll see these two buttons:

Click the one that looks like a picture, and you can resize the image on the next screen:

The drawback here is 80% is a pretty imprecise way of resizing, but you can play around until your images are the sizes you need.
BUT SOLUTION THREE! OH, LET ME TELL YOU ABOUT SOLUTION THREE!: it’s a MUCH BETTTER idea to resize images before posting them to your site, and to do so using a third party application like Photoshop, Gimp, or one of the many simpler and easier online freeware applications like PicMonkey.
The simplest (IT’S VERY SIMPLE!) way to resize an image is to use an online service like PicMonkey.com. We don’t endorse any particular online service here at the OpenLab, and there are many online resizing free services. But this one is solid in that it has the things most people need when resizing (a bit of color changing, a size change option, a crop feature, and a way to reduce file size). If you don’t like PicMonkey, go ahead and search online for “free image resizing” and you’ll find more options than you can handle. And here’s an article that looks at a few similar editors.
Most of these are pretty simple. Just two things to keep in mind:
1) most of the time, roughly 600 pixels wide is the most you need for an image on one of our sites.
2) when it comes to file size, you don’t need a large file for most online work. Save a large image somewhere else, and post images that are less than 60KB. To do this with PicMonkey, move the ‘quality’ slider when you go to save the image.
Here’s an example. The image below was originally 1440 X 1080 pixels–way larger than we need. What we end up with is a thumbnail that’s 600 pixels wide which you can click on to see the full-size image. It’s pretty rare that we need that second size, but it’s on the site now, and taking up an enormous amount of space.
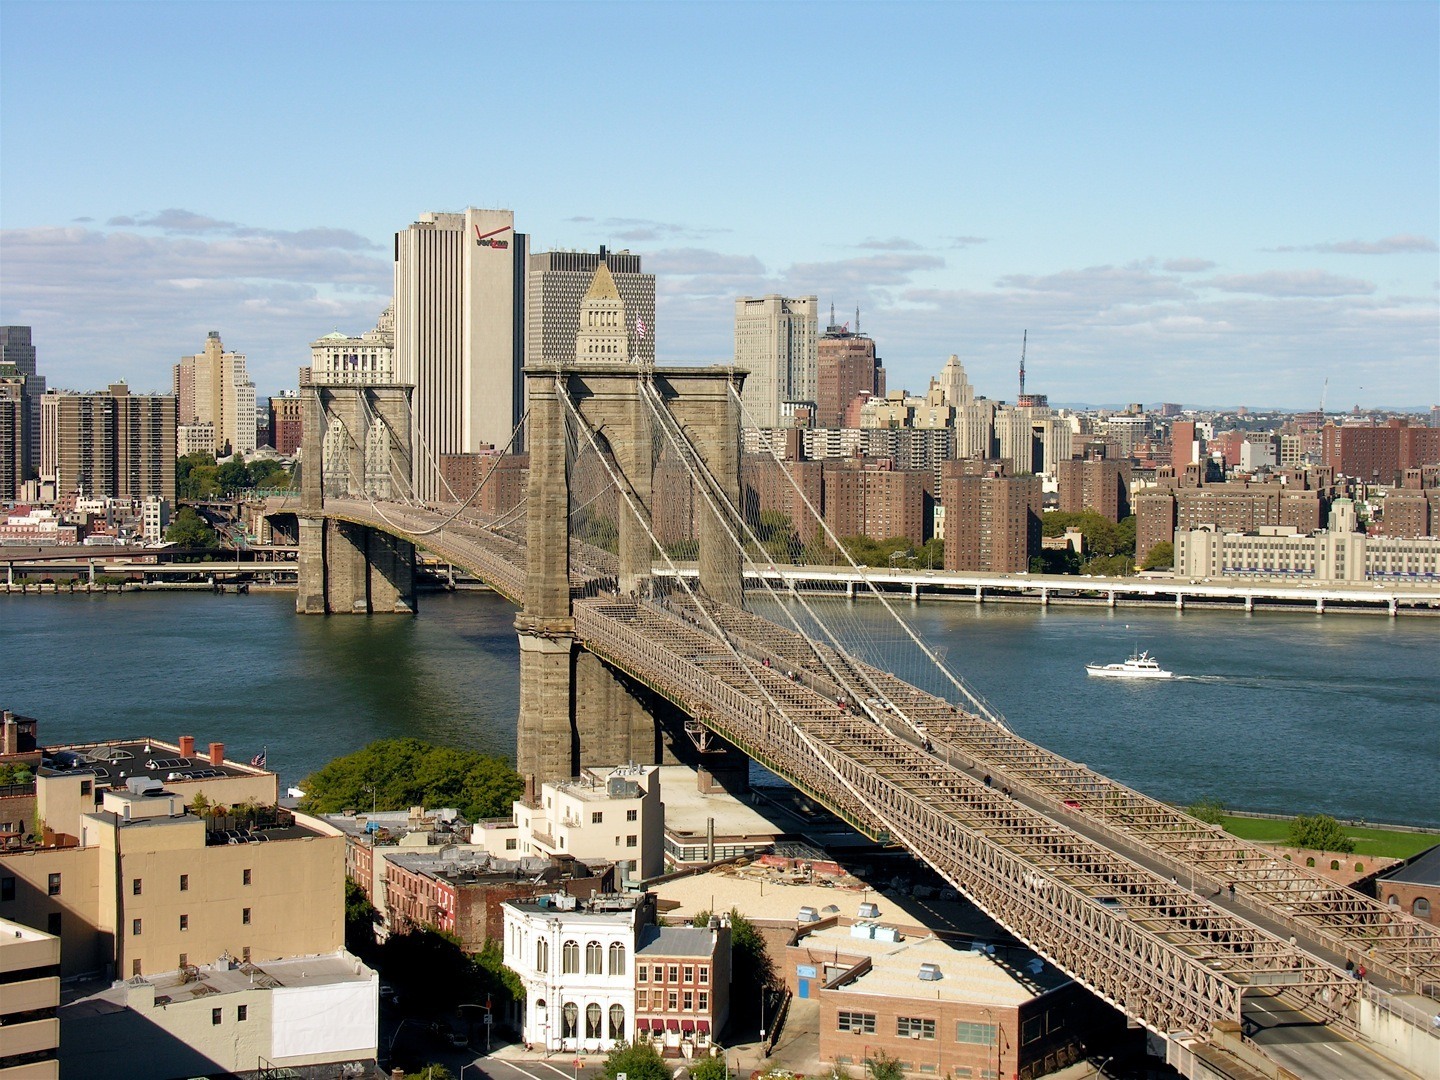
(image by j_bary on Flickr via Creative Commons)
So if we resize the image (I used PicMonkey here) to 600 px wide, and then lower the quality to 50KB, we end up with this:
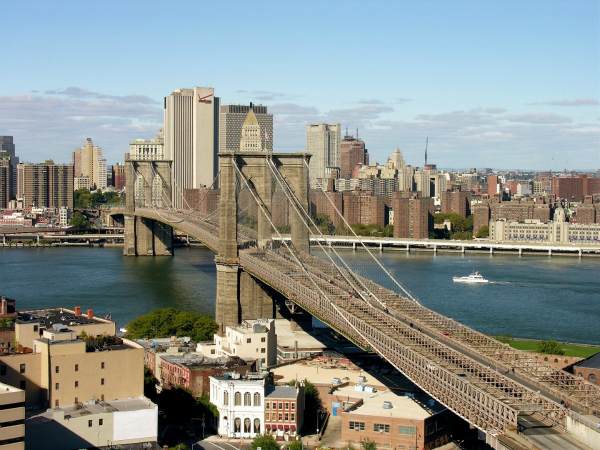
It’s not quite as nice, but it’s going to save you a lot of space on your site, and if you don’t need the larger image, it’s a great idea to do it in advance. Of course, if you do need the larger sizes, you should by all means post them. The key is to think through what you need your images for, so that you can use the extra space when you need to. Images that come straight out of your camera or phone, for example are almost always much larger than you probably need.
Of course, PicMonkey is, as we said, very simple. Much more can be done using Photoshop or Gimp. Here are two short tutorials on doing these simple tasks with these two much more robust applications:
Here’s a tutorial on resizing using photoshop:
And here’s a tutoria on resizing using gimp:


